Fermenting Tomato Seeds — Drying Bean Pods — Storing Heirloom Varieties — Save Money and Grow Better Every Season
📢 This article contains affiliate links. If you purchase through these links, I may earn a small commission at no extra cost to you. Thank you for supporting Grow Glow Garden!
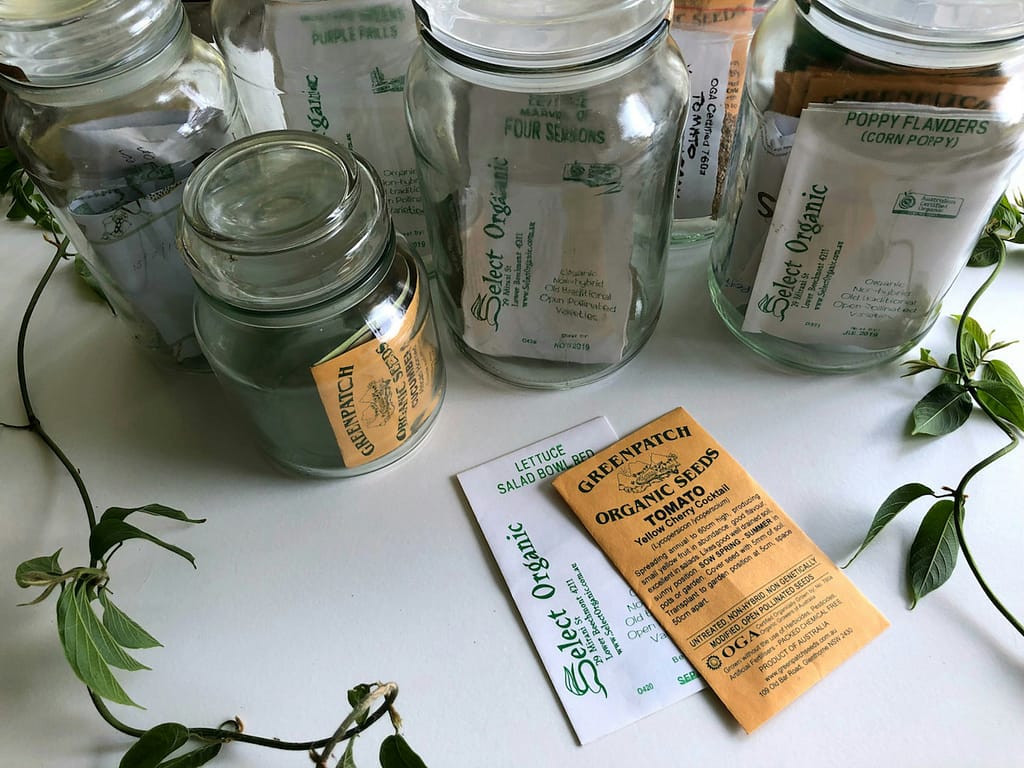
Every season home gardener and small farmers around the world spend hundreds of dollars on seeds — buying the same varieties year after year from hardware stores and agricultural suppliers. But here is something that experienced gardeners have known for generations: you do not have to buy seeds every single season. The best seeds for your garden are already growing in it right now.
Seed saving is the ancient practice of harvesting collecting and storing seeds from your best performing plants to grow again next season. It is one of the most rewarding cost-saving and empowering skills any gardener can develop — and it is far simpler than most people think. With the right techniques you can save high quality seeds from tomatoes beans peppers callaloo and many other summer vegetables that will germinate reliably and grow true to the parent plant season after season.
In this complete guide we cover everything you need to know about saving seeds from your summer vegetable garden — from selecting the best parent plants and harvesting seeds at the perfect time to the fermentation method for tomatoes the drying method for beans and the proper storage techniques that keep your seeds viable all the way through to your 2027 planting season and beyond.
Why Save Seeds? The Compelling Case for Every Jamaican Gardener
Before we get into the how let us talk about the why — because understanding the full value of seed saving is what motivates gardeners to make it a consistent practice rather than something they try once and forget about.
Save Significant Money Every Season
Quality vegetable seeds are not cheap. A single packet of hybrid tomato seeds from a garden centre can cost several hundred Jamaican dollars — and those seeds can only be planted once since hybrid varieties do not breed true from saved seed. Heirloom and open-pollinated varieties on the other hand produce seeds that grow into plants virtually identical to the parent — meaning one season’s saved seeds can supply your entire next season’s planting for free.
A gardener who saves seeds from just five vegetable varieties — tomatoes beans peppers callaloo and cucumber — can realistically eliminate seed purchasing costs almost entirely. Over five to ten years of gardening the savings are substantial especially for small farmers who plant on any meaningful scale.
💡 Pro Tip: Even saving seeds from just one exceptional tomato plant each season can provide you with hundreds of seeds worth several thousand Jamaican dollars — completely free. The time investment is minimal and the financial return is outstanding.
Adapt Seeds to Your Local Conditions
This is perhaps the most compelling argument for seed saving that most gardeners never consider. When you save seeds from plants that have grown successfully in your specific garden — your specific soil your specific microclimate your specific rainfall patterns — those seeds carry genetic information that has been selected by your local conditions. Over multiple generations of saving seeds your plants become increasingly adapted to your specific environment producing better germination rates stronger seedlings and more productive harvests than seeds from elsewhere ever could.
For Jamaican gardeners this means seeds that are progressively better adapted to Jamaica’s tropical climate our specific pest pressures our soil types and our seasonal rainfall patterns. Seeds saved from a tomato that thrived through a particularly dry season carry the genetic resilience to handle future dry seasons. This is how traditional farming communities worldwide developed their legendary locally adapted varieties — and it is available to every gardener who practices seed saving consistently.
🇯🇲 Jamaica Tip: In Jamaica’s warm humid climate locally adapted seeds are particularly valuable because they develop resistance to our specific soil-borne diseases tropical pests and heat stress conditions. A tomato variety saved for just three to five generations in a Jamaican garden will typically outperform the same variety grown from imported seeds in germination rate seedling vigour and overall productivity.
Preserve Heirloom and Traditional Varieties
Many of the most flavourful nutritious and productive vegetable varieties ever developed are not available in commercial seed packets. Traditional Jamaican and Caribbean vegetable varieties — developed and refined over generations by farmers who valued flavour productivity and adaptability over the shelf life and uniform appearance that commercial breeding prioritises — exist only in the hands of gardeners who save and share seeds. Every time a gardener stops saving seeds from a traditional variety that variety moves one step closer to being lost forever.
By saving seeds from traditional varieties you become part of a living chain of preservation that stretches back through generations of Jamaican farmers. You are not just saving seeds — you are preserving agricultural heritage and keeping irreplaceable genetic diversity alive for future generations.
The Golden Rules of Seed Saving — Before You Begin
Before diving into the specific techniques for different vegetables there are fundamental principles that apply to all seed saving and that determine whether your saved seeds will be worth keeping or not worth the effort:
Rule 1 — Only Save from Open-Pollinated or Heirloom Varieties
This is the most important rule in seed saving. Open-pollinated varieties — including all heirloom varieties — produce seeds that grow into plants with the same characteristics as the parent. Hybrid varieties — usually marked F1 on seed packets — do not. Seeds saved from hybrid plants either fail to germinate or produce plants that are dramatically different from the parent — often reverting to one of the two parent varieties used to create the hybrid. Always identify whether your varieties are open-pollinated before investing time in saving their seeds.
⚠️ Important: Never save seeds from plants marked F1 or Hybrid on their seed packet or label. These seeds will not produce plants true to their parent. Only save seeds from open-pollinated or heirloom varieties — these are the varieties worth saving and replanting season after season.
Rule 2 — Select Your Best Plants as Seed Parents
Seed saving is also a form of plant breeding — every generation you select the plants you save seeds from you are influencing the genetics of your future crops. This means always choosing your absolute best plants as seed parents — the most vigorous the most productive the most disease-resistant the best tasting. Never save seeds from weak diseased stressed or below-average plants. The characteristics of your seed parent plants — both good and bad — tend to be carried forward in the seeds.
💡 Pro Tip: Mark your chosen seed parent plants early in the season — tie a coloured string or small flag around the stem — so you remember which plants you have designated for seed saving. Do not harvest all the fruit from these plants for eating — leave some to fully ripen on the plant for seed development.
Rule 3 — Allow Seeds to Fully Mature on the Plant
Seeds must reach full physiological maturity before harvest to be viable for saving. For most vegetables this means leaving fruit significantly longer on the plant than you would for eating. A tomato saved for seed should be allowed to become fully ripe — even slightly overripe and very soft. Beans saved for seed should be left on the plant until the pods have dried and begun to rattle. Peppers should be allowed to change colour fully and become completely ripe. Immature seeds have poor germination rates and produce weak seedlings regardless of how well they are stored.
Rule 4 — Prevent Cross-Pollination When Necessary
Many vegetables can cross-pollinate with other varieties of the same species — meaning insects can carry pollen from one variety to another resulting in seeds that are crosses between the two varieties. For most home gardeners this is not a major concern as long as they grow only one variety of each species. However gardeners growing multiple tomato varieties multiple pepper varieties or multiple cucumber varieties simultaneously should take steps to prevent crossing if they want to maintain pure variety seeds.
The simplest prevention method is isolation — growing different varieties far apart so bees and other pollinators are unlikely to carry pollen between them. Alternatively individual flowers can be covered with small paper bags before they open and hand pollinated to guarantee pure seeds.
How to Save Tomato Seeds — The Fermentation Method
Tomato seeds are surrounded by a gelatinous coating that contains germination inhibitors — compounds that prevent the seed from sprouting while still inside the fruit. In nature this coating breaks down through the fermentation that occurs when fallen tomatoes rot on the ground. To save tomato seeds successfully at home we replicate this natural fermentation process in a controlled way. The fermentation method also kills many seed-borne diseases that could otherwise be passed on to next season’s seedlings.
Choosing the Right Tomatoes for Seed Saving
Select tomatoes from plants that have performed exceptionally well throughout the season — high yields good disease resistance excellent flavour and vigorous growth. Choose large fully ripe fruits — the larger and riper the tomato the better developed the seeds inside. Avoid saving seeds from the first or last fruits of the season which tend to be less well-developed than fruits from the middle of the harvest period.
🇯🇲 Jamaica Tip: In Jamaica look for tomatoes that showed strong performance during both the dry season heat stress and the rainy season humidity — plants that performed well through both conditions are particularly valuable seed parents for our tropical climate.
Step-by-Step Tomato Seed Fermentation
Step 1 — Select and Cut Your Tomatoes: Choose 2 to 3 fully ripe healthy tomatoes from your best performing plant. Cut each tomato in half across the equator — not from top to bottom — to expose the seed cavities clearly.
Step 2 — Squeeze Seeds and Gel into a Container: Squeeze the seeds and the surrounding gel into a clean glass jar or plastic container. Add an equal amount of water to the seed and gel mixture — approximately half a cup of water per tomato. Label the container with the variety name and date.
Step 3 — Ferment for 2 to 4 Days: Cover the container loosely with a piece of cloth or lid placed slightly ajar — not sealed tightly — and leave at room temperature away from direct sunlight. In Jamaica’s warm climate fermentation typically takes just 2 to 3 days compared to 3 to 5 days in cooler climates. A layer of white or grey mould will form on the surface — this is completely normal and desirable. Stir once daily.
Step 4 — Check for Completion: Fermentation is complete when a significant layer of mould covers the surface and the viable seeds have sunk to the bottom of the container. Non-viable seeds and the gelatinous coating will float — only the seeds that have sunk are worth keeping.
Step 5 — Rinse Seeds Thoroughly: Pour off the mouldy surface water carefully. Add clean water to the container and swirl gently — the non-viable material will float and can be poured off. Repeat this rinsing process 3 to 4 times until the water runs clear and only clean seeds remain at the bottom.
Step 6 — Dry Seeds Completely: Spread the rinsed seeds in a single thin layer on a ceramic plate a piece of glass or non-stick baking paper. Do NOT use paper towels or newspaper — tomato seeds stick to these and are difficult to remove without damage. Place in a warm airy location out of direct sunlight. In Jamaica’s climate seeds will dry within 5 to 7 days. Stir daily to prevent clumping. Seeds are fully dry when they no longer stick together and snap rather than bend when pressure is applied.
⚠️ Important: Never dry tomato seeds in direct sunlight or in an oven — high heat permanently damages the seed embryo and dramatically reduces germination rates. Always dry at room temperature in a well-ventilated location. Seeds that look dry on the outside may still contain moisture inside — allow at least 5 to 7 full days of drying in Jamaica’s climate before storage
Testing Tomato Seed Viability Before Storage
Before storing your dried tomato seeds test their viability to ensure your effort was worthwhile. Place 10 seeds on a damp paper towel fold it over and seal in a plastic bag. Keep at room temperature for 7 to 10 days. Count how many seeds germinate. If 7 or more germinate you have excellent seed quality — 80 percent or better viability. If 5 to 6 germinate quality is acceptable. Fewer than 5 indicates poor viability and the seeds may not be worth storing.
As an Amazon Associate, I earn from qualifying purchases
How to Save Bean Seeds — The Drying Method
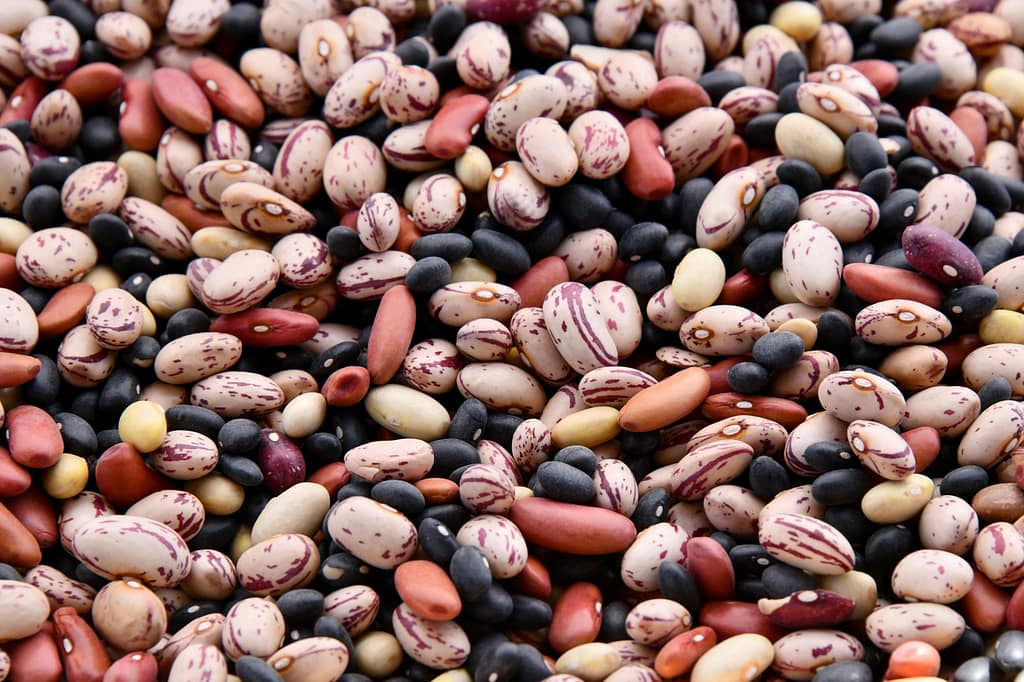
Beans are among the easiest vegetables to save seeds from making them an ideal starting point for beginner seed savers. Unlike tomatoes beans require no fermentation — the process is simply allowing the pods to dry completely on the plant before harvest. Beans are also naturally self-pollinating meaning they rarely cross with other bean varieties making it straightforward to maintain pure variety seeds.
When to Stop Harvesting for Seed Saving
The key decision in bean seed saving is knowing when to stop harvesting pods for eating and start leaving pods to mature for seed. Designate specific plants or specific branches of plants for seed saving early in the season. Stop picking pods from these designated plants when they reach the size you would normally harvest for eating — instead leave them on the plant to continue maturing.
💡 Pro Tip: The best approach for home gardeners is to designate 2 to 3 of your most productive bean plants entirely for seed saving while harvesting the remaining plants normally for eating. This gives you an adequate seed supply without significantly reducing your edible harvest.
Step-by-Step Bean Seed Drying
Step 1 — Allow Pods to Dry on the Plant: Leave selected bean pods on the plant until they have changed colour from green to yellow tan or brown depending on the variety and have become papery dry and brittle. The seeds inside should be visibly bulging through the pod walls. In Jamaica’s sunny dry season this process takes approximately 3 to 4 weeks after normal harvest stage.
Step 2 — Harvest Dried Pods: Harvest pods when they have fully dried on the plant and before any rain can cause them to reabsorb moisture and potentially mould. If heavy rain is forecast harvest pods that are nearly dry and complete drying indoors. The pods should rattle when shaken — you can hear the dry seeds moving inside.
Step 3 — Complete Drying Indoors: Even pods that appear dry on the plant should be brought indoors for an additional 1 to 2 weeks of drying in a warm airy location. Spread pods in a single layer on a flat surface or hang bunches in a well-ventilated area. This additional drying ensures seeds reach the very low moisture content needed for long-term storage.
Step 4 — Shell the Pods: Once fully dry shell the pods by hand — snap them open along the seam and remove the seeds. For large quantities of beans place dried pods in a pillowcase or cloth bag and beat gently against a hard surface — the seeds will separate from the pods. Spread seeds on a flat surface and remove any remaining pod fragments by hand or by blowing gently across them outdoors on a breezy day.
Step 5 — Final Check and Sort: Examine each seed and discard any that are visibly damaged cracked discoloured shrivelled or much smaller than average. These seeds are unlikely to germinate well. Keep only plump full-sized uniformly coloured seeds that look exactly like the seeds you would want to plant.
🇯🇲 Jamaica Tip: In Jamaica the dry season provides ideal natural conditions for bean seed drying on the plant. Time your seed saving beans to mature during the drier months of January through April when humidity is lower and the risk of pod mould before harvest is reduced. Rainy season bean seed saving is more challenging — watch pods carefully and harvest as soon as they are sufficiently dry to avoid mould developing in humid conditions.
Saving Seeds from Other Summer Vegetables
Beyond tomatoes and beans many other summer vegetables can be successfully seed-saved using variations of the same basic principles. Here are the key techniques for the most important additional crops:
Pepper Seeds — Scotch Bonnet Sweet Pepper and Chilies
Peppers are among the easiest seeds to save — simply allow fruits to ripen fully on the plant until they change to their final ripe colour red orange yellow or brown depending on variety. Fully ripe peppers produce the most viable seeds. Cut the pepper open and scrape the seeds from the central white membrane. Spread seeds in a single layer on a plate or glass surface and dry at room temperature for 1 to 2 weeks until completely dry and hard.
⚠️ Important: Always wear gloves when handling scotch bonnet pepper seeds — the capsaicin that makes these peppers so fiercely hot is heavily concentrated in the seeds and surrounding membrane and causes intense burning on contact with skin and eyes.
🇯🇲 Jamaica Tip: Scotch bonnet peppers are a perennial in Jamaica meaning the plant itself can survive for several years. However saving and replanting seeds each season ensures you maintain your best performing plants’ genetics and have backup seeds in case plants are lost to disease or severe weather.
Cucumber Seeds
To save cucumber seeds allow one or two cucumbers per plant to remain on the vine far longer than you would for eating — the fruit will yellow and swell significantly as seeds develop to full maturity. When the cucumber turns completely yellow and begins to soften harvest it and cut it open lengthwise. Scoop out the seeds and gel into a container. Use the same fermentation method as tomatoes — ferment for 1 to 2 days rinse thoroughly and dry completely before storing.
💡 Pro Tip: A cucumber saved for seed may look unappetising compared to a fresh harvested cucumber — it will be large yellow and very soft. This is perfectly normal and actually indicates the seeds inside are well matured and viable. Never save seeds from cucumbers at the stage you would eat them — the seeds are not yet fully developed
Callaloo and Leafy Greens
Callaloo and other leafy greens like amaranth go to seed naturally at the end of their productive life. Allow plants to bolt — produce tall flower stalks — and let the flowers develop fully into seed heads. When seed heads begin to dry and seeds can be rubbed out easily cut the entire seed head and place in a paper bag. Hang the bag upside down in a warm dry location for 1 to 2 weeks. Seeds will fall to the bottom of the bag as they continue to dry. Shake the bag daily to help seeds separate from the dry flower heads.
Squash and Pumpkin Seeds
Squash and pumpkin seeds are among the simplest to save because they are already separated from the flesh when you cut the vegetable for cooking. Simply rinse seeds thoroughly to remove all flesh fibres spread in a single layer on a plate and dry at room temperature for 2 to 4 weeks. Stir daily to ensure even drying. Seeds are ready for storage when they are completely hard and make a clicking sound when dropped on a hard surface.
Long-Term Seed Storage — Keeping Your Seeds Viable Until 2027 and Beyond
Properly saved seeds are living organisms and their longevity depends entirely on the storage conditions they experience after harvest. The two greatest enemies of seed viability are moisture and heat — both of which are unfortunately abundant in Jamaica’s tropical climate. With the right storage approach however Jamaican gardeners can keep most vegetable seeds viable for 3 to 5 years or longer.
The Ideal Storage Conditions
Seeds store best in conditions that are cool dry and dark. For every 10 degree reduction in temperature seed longevity approximately doubles. For every 1 percent reduction in seed moisture content seed longevity also approximately doubles. This means the difference between storing seeds at room temperature in a humid environment versus in a cool dry sealed container is not a matter of months — it is a matter of years.
Step-by-Step Seed Storage
Step 1 — Ensure Seeds Are Completely Dry: Before storage seeds must be absolutely dry — any residual moisture will cause mould or premature germination in storage. Test dryness by trying to bend a seed — fully dry seeds snap and break while seeds that still contain moisture will bend without breaking. Allow additional drying time if seeds bend rather than snap.
Step 2 — Add a Desiccant to Absorb Moisture: Place a small sachet of silica gel desiccant in your storage container — these absorb any residual moisture from the air inside the container protecting seeds from humidity damage. Silica gel sachets are reusable — dry them in a low oven when they become saturated with moisture.
As an Amazon Associate, I earn from qualifying purchases
Step 3 — Package Seeds Correctly: Place seeds in small paper envelopes or paper coin envelopes — one variety per envelope. Label each envelope clearly with the variety name date saved and any important notes about the parent plant’s performance. Paper envelopes allow any residual moisture to continue escaping — never store seeds in sealed plastic bags long-term as moisture becomes trapped.
Step 4 — Choose the Right Storage Container: Place your labeled seed envelopes in an airtight glass jar or a sealed tin container along with your silica gel sachet. Glass mason jars with rubber-sealed lids are excellent choices. Metal tins with tight-fitting lids also work very well. The goal is to seal out humidity from the surrounding air. Step 5 — Store in the Coolest Location Available: In Jamaica finding genuinely cool storage is the biggest challenge. The best options in order of preference are: a dedicated seed storage area in an air-conditioned room — the coolest and most consistent temperature available; a refrigerator — effective but ensure seeds are in a completely sealed airtight container before refrigerating to prevent moisture damage; a cool indoor location away from windows and heat sources — a closet or cupboard in an interior room of the house
Seed Viability Chart — How Long Seeds Last
Use this guide to know how long to keep your saved seeds before replacing them with fresh seed from new plants:
Tomatoes — 4 to 6 years stored properly ✅
Peppers and Scotch Bonnets — 2 to 4 years stored properly ✅
Beans and Peas — 3 to 5 years stored properly ✅
Cucumbers — 5 to 7 years stored properly ✅
Squash and Pumpkin — 4 to 6 years stored properly ✅
Callaloo and Amaranth — 3 to 5 years stored properly ✅
Melons and Watermelon — 5 to 7 years stored properly ✅
🇯🇲 Jamaica Tip: In Jamaica’s heat and humidity seeds stored without proper desiccant and sealed containers may only remain viable for 6 to 12 months. With proper airtight storage and silica gel desiccant these same seeds can remain viable for 3 to 5 years or longer. The investment in good storage containers and silica gel pays for itself many times over in money saved on seeds.
Labelling and Organizing Your Seed Collection
A well-organized seed collection is easy to use and ensures you always know exactly what you have and how old each seed lot is. Here is the information to record on every seed envelope:
- Variety name — as specific as possible
- Date saved — month and year
- Parent plant notes — any exceptional characteristics worth recording
- Harvest location — which garden bed or container
- Germination test result — percentage that germinated when tested
- Quantity saved — approximate number of seeds
💡 Pro Tip: Create a simple seed inventory notebook or spreadsheet listing all your saved seeds their dates and their storage location. Update it each season as you add new seeds and use old ones. This simple system prevents you from accidentally planting seeds that are too old and ensures you systematically rotate through your collection.
As an Amazon Associate, I earn from qualifying purchases
Planning Your 2027 Seed Saving Calendar
Timing your seed saving activities correctly throughout the growing season ensures you always have adequate time to process and store seeds before the next planting season. Here is a suggested seed saving calendar for Jamaican gardeners planning for 2027:
Dry Season — January to April 2026
- Designate seed saving plants from your current crop — mark them clearly
- Allow selected tomatoes to over-ripen fully on the plant
- Begin fermentation processing of tomato seeds as fruits reach full ripeness
- Allow bean pods to dry completely on the plant in the dry season sun
- Save pepper seeds from fully coloured ripe fruits
- Process and dry all saved seeds thoroughly during this low-humidity period
Rainy Season — May to November 2026
- Store all processed seeds in airtight containers with silica gel desiccant
- Conduct germination tests on seeds saved earlier in the year
- Save seeds from rainy season crops — callaloo pumpkin cucumber
- Keep storage containers in coolest available location
- Update your seed inventory records
Preparation for 2027 Planting Season — December 2026
- Review your seed inventory and identify any varieties needing replenishment
- Conduct final germination tests on all seeds before the planting season
- Discard any seeds with poor germination rates and plan to purchase replacements
- Organize seeds by planting priority for the coming season
- Share surplus seeds with fellow gardeners and farming community members
Sharing Seeds — Building a Seed Saving Community
One of the most rewarding aspects of seed saving is the community it builds. Seed saving gardeners traditionally share seeds freely with neighbours farmers and fellow gardeners — a practice that strengthens entire communities by increasing the variety of crops grown locally spreading the benefits of locally adapted seeds and building relationships between people who share a love of growing food.
Consider organising or participating in a seed exchange with other Jamaican gardeners — either locally in your community or through online groups. Each gardener who participates brings seeds from varieties they have been saving and leaves with seeds of varieties they have never grown before. This enriches every participating garden and helps preserve a wider range of valuable traditional varieties.
🇯🇲 Jamaica Tip: Jamaica has a rich tradition of seed sharing among farming communities that stretches back generations. Reviving and strengthening this tradition is one of the most valuable things modern Jamaican gardeners can do — both for the practical benefits of accessing diverse locally adapted varieties and for the cultural value of maintaining the relationships and knowledge-sharing practices that have sustained Jamaican agriculture for centuries.
Related Articles You Might Find Helpful
🌱 How to make compost at home — turn kitchen scraps into free fertilizer for your vegetable garden
🌱 Natural pest and disease control — proven natural remedies to protect your Jamaican vegetable garden safely
🌱 Best vegetables to grow in Jamaica’s dry season — the top crops that thrive when rainfall is scarce
🌱 Container gardening for small space — grow food anywhere in pots on any balcony or small space
🌱 Why are my vegetable plants wilting — identify and fix the most common causes of plant stress in Jamaica
Conclusion
Seed saving is one of the most ancient and empowering skills in all of agriculture — and it is as relevant and valuable for Jamaican home gardeners today as it has ever been. In a world where seed costs continue to rise and commercial seed varieties are increasingly designed for industrial growing conditions rather than home gardens the ability to save your own high-quality locally adapted seeds is a genuine competitive advantage for any gardener who develops it.
Start small — choose just one or two varieties to save this season. Master the fermentation method for tomatoes or the drying method for beans. Store your seeds properly and test their viability. Then expand your seed saving practice season by season until you have a diverse collection of locally-adapted heirloom varieties that are perfectly suited to your specific garden your specific climate and your family’s specific food preferences.
The seeds you save this season are your 2027 harvest — and every harvest after that. Start saving today! 🌱
Did this guide help you understand how to save seeds from your summer vegetable garden? Leave a comment below — I read and respond to every single one and would love to hear which varieties you are planning to save seeds from this season. Thank you for reading and happy growing! 🌱