Everything You Need to Know to Grow the Biggest Most Flavourful Garlic of Your Life — Step by Step
📢 Affiliate Disclosure: This article contains affiliate links. If you purchase through these links, I may earn a small commission at no extra cost to you. Thank you for supporting Grow & Glow Garden!
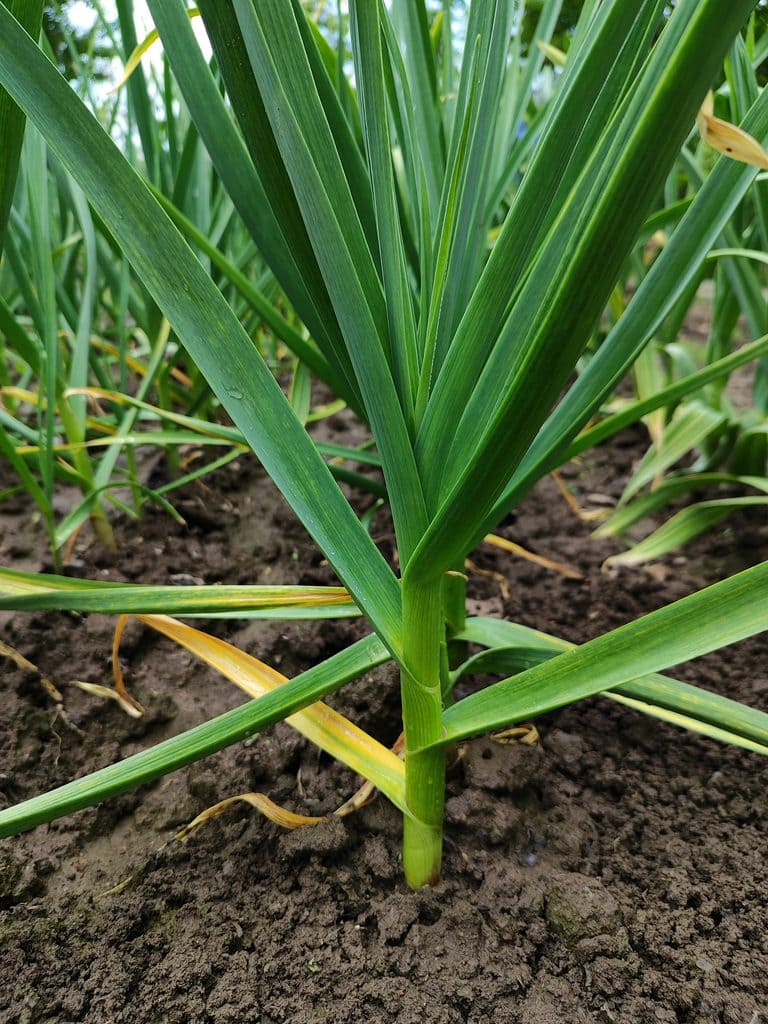
Picture this. You reach down into the soil in late summer pull upward and out comes a garlic bulb so large and heavy it almost seems impossible. The papery skin is perfectly formed the cloves are fat and tight and the smell — that deep rich unmistakable smell of freshly harvested garlic — fills the air around you. You set it down next to the others already harvested and you cannot help but smile. Because you grew this. You planted it months ago and now here it is — one of the most rewarding harvests any home gardener can experience.
But here is the thing — most people who try to grow garlic end up with a disappointing result. Small flat bulbs with tiny cloves that barely seem worth the effort. Bulbs that split or rot before they are ready. Harvests that do not look anything like the beautiful garlic they see at farmers markets or in gardening magazines.
The difference between disappointing garlic and spectacularly large, beautiful garlic comes down to a handful of specific secrets that experienced garlic growers know, and beginners almost never hear about. Secrets about timing soil preparation variety selection watering curing and a dozen other details that individually might seem minor but together make the difference between garlic that underwhelms and garlic that stops people in their tracks.
This guide reveals every single one of those secrets. Read it carefully plant your garlic this fall using exactly what you learn here and next summer you will harvest garlic that makes your neighbors ask what on earth your secret is.
🧄 SECRET: The single biggest secret in garlic growing that most beginner gardeners never hear: Garlic needs a cold period called vernalization to trigger bulb formation. Without adequate cold the plant grows but never divides into separate cloves — producing a single unsegmented bulb with no culinary value. Getting the cold exposure right is the foundation of everything else in this guide.
Why Fall Planting Is the Non-Negotiable Foundation of Huge Garlic
Garlic is one of the most ancient, cultivated crops in human history — grown for over 5000 years across every continent. And in all of those thousands of years of cultivation one thing has remained constant: garlic planted in the fall reliably produces larger healthier more flavourful bulbs than garlic planted at any other time of year. This is not tradition or folklore — it is plant biology.
The Science of Vernalization — Why Cold Makes Huge Bulbs
Vernalization is the biological process by which a plant requires a period of cold temperatures to complete its normal development cycle. For garlic this cold period — typically 6 to 8 weeks at temperatures between 0 and 10 degrees Celsius — triggers a fundamental change in how the plant develops. Without adequate vernalization garlic produces a single round bulb with no cloves — called a rounds — that is essentially useless for culinary purposes. With proper vernalization the plant divides beautifully into the familiar multiple-clove bulb structure that is the whole point of growing garlic.
Fall planting works because it exposes garlic cloves to the natural cold of winter in the ground — the ideal vernalization environment. The cold soil gradually chills the planted cloves through the winter months providing exactly the cold exposure needed for maximum bulb development. By the time spring arrives and temperatures warm the vernalization process is complete and the plant is perfectly primed to put all its energy into producing the largest possible bulb.
💡 Pro Tip: The minimum cold requirement for garlic vernalization is approximately 6 weeks at or below 10 degrees Celsius. Gardeners in warmer climates who struggle to provide this natural cold through winter planting can pre-vernalize garlic cloves by refrigerating them for 6 to 8 weeks before planting — a technique covered in detail later in this guide.
The Root Development Advantage of Fall Planting
Beyond vernalization fall planting gives garlic something equally valuable — time to develop an extensive root system before the growing season begins. When garlic is planted in fall and the soil is still warm from summer the cloves quickly develop roots that anchor deeply into the soil and begin accessing nutrients. These roots continue growing slowly even as temperatures drop and the soil cools — establishing a deep and extensive root network that spring-planted garlic simply never has time to develop.
When spring arrives and temperatures warm this deeply rooted fall-planted garlic immediately explodes into vigorous top growth — drawing on nutrients from a much larger soil volume than spring-planted garlic with its shallow recently developed roots. The result is significantly larger plants from the very beginning of the growing season — and larger plants consistently produce larger bulbs.
The Flavour Development Secret
There is one more advantage of fall planting that rarely gets discussed but that every serious garlic grower knows instinctively — fall-planted garlic that experiences a proper cold winter consistently produces more flavourful garlic than garlic grown in any other way. The slow cold development period appears to concentrate the sulphur compounds responsible for garlic’s distinctive flavour and health properties producing bulbs that are not just larger but genuinely more intensely flavourful than garlic rushed through a shorter growing season.
🇯🇲 Jamaica Note: In Jamaica and other tropical climates natural winter cold for vernalization is limited or unavailable in most lowland areas. However, Jamaica’s cooler elevated areas — the Blue Mountains Portland Ridge and parts of St Elizabeth — do experience sufficient cold for natural vernalization. Lowland Jamaican gardeners can successfully grow garlic using the refrigerator pre-vernalization technique covered in Section 4 of this guide — producing surprisingly good results even without natural cold winters.
Choosing the Right Variety — The Decision That Determines Everything
If you want huge garlic bulbs the single most important decision you make before you even touch the soil is choosing the right variety. Not all garlic varieties are equal in size flavour or suitability for your specific climate. Growing the wrong variety for your conditions is the most common reason experienced gardeners who do everything else correctly still end up with disappointing small bulbs.
Hardneck vs Softneck — Understanding the Fundamental Divide
All garlic varieties fall into one of two fundamental categories — hard neck and soft neck — and understanding the differences between them is essential for making the right choice for your garden.
Hardneck Garlic — The Gourmet Choice for Bigger Bulbs
Hardneck garlic varieties produce a hard central stem called a scape that shoots up from the centre of the plant in early summer. They generally produce fewer but larger cloves per bulb — typically 4 to 12 large fat cloves arranged in a single layer around the central stem. Hardneck varieties are prized by serious garlic growers and chefs because of their more complex nuanced flavour and their significantly larger individual cloves.
- Rocambole hardneck — considered by many chefs and growers to be the finest flavoured garlic available. Rich complex earthy flavour with a slight sweetness. Produces 8 to 12 large fat cloves per bulb. Performs best in cold climates with defined winters.
- Porcelain hardneck — produces some of the largest individual bulbs and cloves available in any garlic variety. Fewer cloves per bulb — 4 to 6 — but each clove is exceptionally large and flavourful. The variety most likely to produce the truly massive show-stopping bulbs that garlic enthusiasts dream about.
- Purple Stripe hardneck — beautiful purple-striped papery skin with excellent rich flavour. More heat-tolerant than Rocambole making it better suited to warmer climates. Produces 8 to 12 cloves per bulb of good size.
- Marbled Purple Stripe — one of the most ancient garlic types. Produces very large bulbs with complex flavour and beautiful marbled purple outer skin. Excellent storage quality.
Softneck Garlic — The Commercial Standard
Softneck garlic produces no central hard stem — the leaves remain soft and flexible which is why softneck varieties can be braided. They generally produce more cloves per bulb than hardneck varieties — 12 to 20 smaller cloves arranged in multiple layers. Softneck varieties store significantly longer than hardneck — up to 12 months in good conditions versus 3 to 6 months for hardneck.
- Artichoke softneck — the most widely grown garlic type commercially. Produces large bulbs with many cloves. More adaptable to varying climate conditions including warmer climates. Less complex flavour than hardneck but very productive.
- Silverskin softneck — the longest storing of all garlic types — up to 12 months in ideal conditions. Produces many small to medium cloves. Best suited to mild winter climates. The variety most commonly found in supermarkets.
The Variety Secret Most Guides Never Tell You
🧄 SECRET: Seed garlic — garlic cloves specifically grown and selected for planting rather than for eating — consistently produces significantly larger bulbs than grocery store garlic. Commercial grocery store garlic is often treated with growth inhibitors to prevent sprouting during long storage and may be varieties specifically bred for commercial shelf life rather than maximum bulb size. Always source your planting garlic from a reputable seed supplier or from a trusted gardener who saves and selects their best bulbs each season.
Choosing Varieties for Warmer and Tropical Climates
Gardeners in warmer climates including most Caribbean and tropical locations face a specific challenge — many of the finest hard neck garlic varieties are bred for cold climates and perform poorly without adequate natural cold. For warmer climate gardeners these are the best variety choices:
- Creole garlic — developed specifically for warm climates. Produces beautiful bulbs with a hot complex flavour even without significant cold vernalization. Excellent choice for warm lowland Caribbean gardens.
- Asiatic and Turban types — early-maturing hardneck varieties that need less cold vernalization than other hardneck types. Good choice for climates with mild rather than severe winters.
- Artichoke softneck varieties — the most heat-tolerant and adaptable of all garlic types. Consistently produce reasonable bulbs even in warm climates with limited cold.
- Elephant garlic — technically not true garlic but a close relative that produces enormous bulbs with a milder flavor. Significantly more heat-tolerant than true garlic and produces impressive results in tropical and subtropical climates.
As an Amazon Associate, I earn from qualifying purchase.
The Perfect Garlic Soil — Building the Foundation for Monster Bulbs
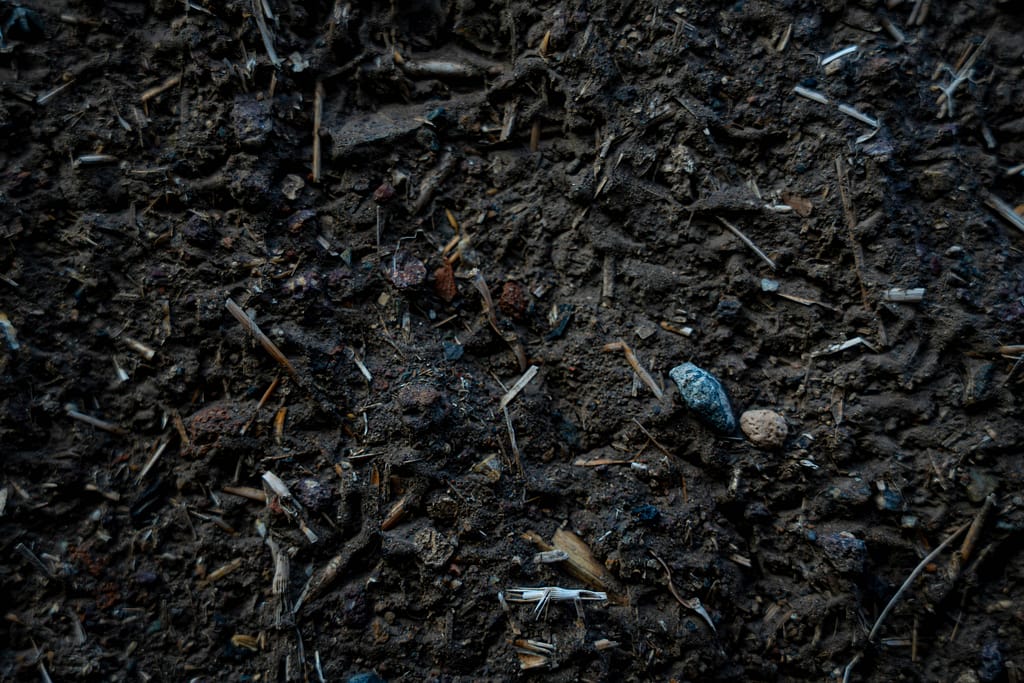
If garlic variety selection is the decision that determines your maximum potential then soil preparation is the work that determines whether you actually achieve it. Garlic is one of the most soil-sensitive vegetables you can grow — the difference between garlic grown in excellent well-prepared soil and garlic grown in average unprepared soil is not subtle. It is the difference between bulbs you are proud to show people and bulbs you are embarrassed to mention.
What Garlic Soil Absolutely Must Have
Exceptional Drainage — The Non-Negotiable
Garlic will not — cannot — produce large bulbs in waterlogged poorly draining soil. This is the single most common cause of garlic failure worldwide. Garlic roots need oxygen and standing water suffocates them cutting off nutrient uptake at exactly the time the developing bulb needs maximum nutrition. Worse waterlogged soil creates the perfect conditions for the fungal diseases — particularly Fusarium and white rot — that are the most devastating diseases in garlic production.
Creating genuinely excellent drainage is the most important soil preparation step you will take. In heavy clay soils this means raising your garlic bed — either in a formal raised bed or in a mounded ridge — to lift roots above the water table and dramatically improve drainage. Adding generous amounts of coarse sand or perlite to clay soils improves their structure and drainage. In sandy soils that drain too fast adding organic matter improves moisture retention while maintaining good drainage.
💡 Pro Tip: The simple drainage test every garlic grower should perform before planting: dig a hole 30cm deep in your intended garlic bed and fill it with water. If the water drains within 30 minutes your drainage is adequate. If water is still standing after 2 hours your drainage is poor and you must either raise your bed or significantly amend your soil before planting garlic.
Rich Organic Matter — Feeding the Monster
Garlic is a heavy feeder that produces its enormous bulbs by drawing massive amounts of nutrients from the surrounding soil over a long growing season. Soil that is rich in organic matter and well-supplied with nitrogen phosphorus and potassium consistently produces larger bulbs than nutrient-poor soil regardless of how well everything else is managed. The target for garlic growing soil is at least 4 to 6 percent organic matter — roughly double the average garden soil.
The best way to build organic matter quickly is through generous compost application — at least 3 to 4 inches of well-finished compost worked into the top 20 to 25cm of your garlic bed before planting. Well-rotted manure is another excellent organic matter source with the added benefit of providing a slow-release nitrogen supply that sustains garlic through its long growing season.
The Ideal pH for Maximum Bulb Size
Garlic grows best in a soil pH between 6.0 and 7.0 — slightly acidic to neutral. Outside this range nutrient availability drops significantly even in otherwise well-fertilized soil because soil chemistry prevents plants from absorbing nutrients that are technically present. A soil that tests at pH 5.5 — quite common in gardens that have received heavy rainfall without lime application — may be adequately fertilized but will still produce small garlic because the plant simply cannot access the nutrients it needs.
Test your soil pH before planting garlic and adjust if necessary. If pH is below 6.0 apply agricultural lime at the recommended rate and work, it into the soil several weeks before planting. If pH is above 7.5 apply Sulphur to lower, it. This single step of testing and correcting pH has produced dramatic improvements in garlic size for many growers who previously could not understand why their garlic consistently underperformed.
As an Amazon Associate, I earn from qualifying purchase.
The Complete Soil Preparation Process
Here is the exact soil preparation sequence that consistently produces the largest garlic bulbs:
- 6 to 8 weeks before planting — test soil pH and adjust if needed — lime or sulphur takes time to act
- 3 to 4 weeks before planting — spread 3 to 4 inches of aged compost or well-rotted manure across the entire bed
- 2 to 3 weeks before planting — work compost into the top 25 to 30cm of soil thoroughly
- 1 to 2 weeks before planting — add a balanced fertilizer with moderate nitrogen and good phosphorus and potassium
- Immediately before planting — rake bed smooth and level — create a fine loose seedbed
- Optional but recommended — water the prepared bed thoroughly and allow to settle for several days before planting
🧄 SECRET: Professional garlic growers add a small amount of bone meal to each planting hole when setting individual cloves. Bone meal is rich in phosphorus which is critical for root development in the early weeks after planting. Strong early root development is directly correlated with larger final bulb size. One small tablespoon of bone meal worked into the bottom of each planting hole can make a measurable difference to final bulb size.
The Planting Process — Every Detail That Determines Bulb Size
How you plant garlic is as important as when you plant it and what soil you plant it in. The specific details of clove selection orientation depth spacing and timing all have measurable effects on final bulb size. Most garlic guides give you the basics. This section gives you everything — including the details that separate good garlic from exceptional garlic.
Selecting Your Planting Cloves — The Most Critical Preparation Step
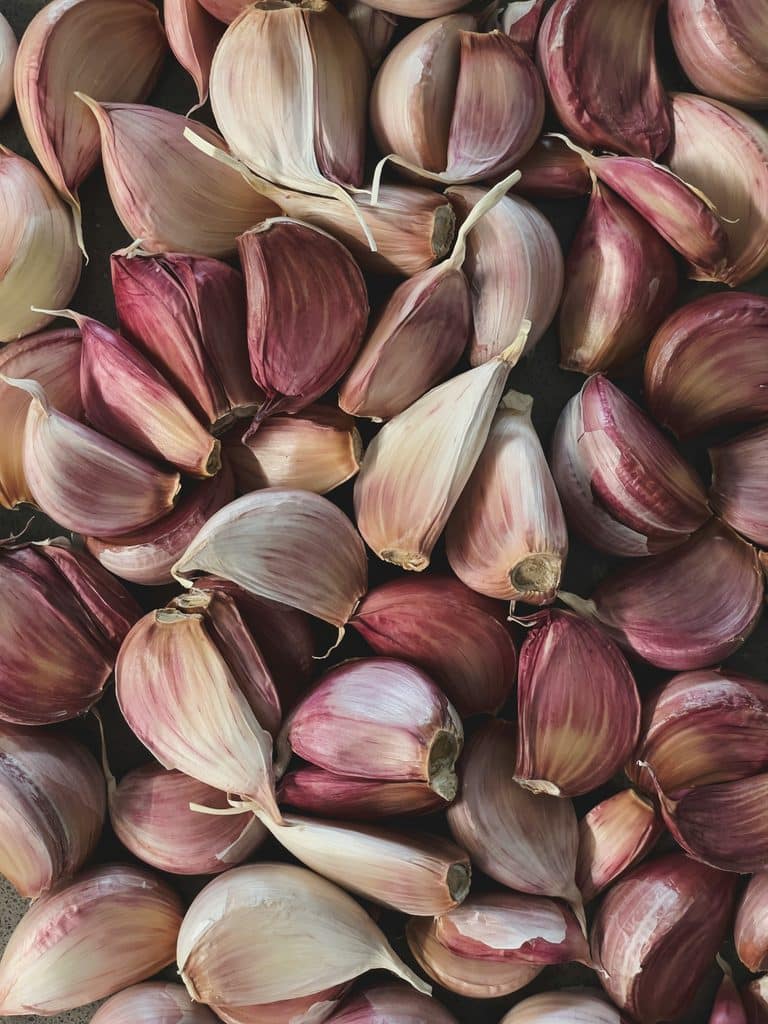
The size of your finished garlic bulb is directly and powerfully influenced by the size of the clove you plant. This is not merely a rough correlation — it is one of the most consistent and reliable relationships in all of vegetable growing. Large cloves produce large plants which produce large bulbs. Small cloves produce small plants which produce small bulbs. Period.
🧄 SECRET: Always plant the largest outer cloves from your best and largest bulbs. Eat the smaller inner cloves and save every large outer clove for planting. If you are buying seed garlic look for the largest bulbs available and select only the largest cloves from those bulbs. This single practice of ruthlessly selecting only the largest clove for planting is the most immediately impactful change any garlic grower can make to increase their average bulb size.
Beyond size look for cloves that are:
- Firm and solid with no soft spots indicating rot or disease
- Fully formed with no obvious damage cuts or blemishes
- Well-filled with no shrivelling or signs of dehydration
- Still fully enclosed in their papery skin — do not plant exposed bare cloves if possible
- Free from any mould spots or discolouration
⚠️ Warning: Never plant cloves that show any signs of blue green or white mold on their surface. Fusarium and Penicillium molds on individual cloves will spread through your entire bed destroying your garlic crop. If in doubt discard rather than plant.
The Vernalization Secret for Warm Climate Gardeners
For gardeners in Jamaica and other warm tropical or subtropical climates where natural winter cold is insufficient for garlic vernalization the refrigerator pre-vernalization method provides a reliable alternative. This technique tricks garlic cloves into believing they have experienced a cold winter — triggering the biological changes necessary for proper bulb formation even when outdoor temperatures never get cold enough to do it naturally.
The Refrigerator Pre-Vernalization Method
- Step 1 — Select your best large cloves from your chosen variety as described above
- Step 2 — Do not break cloves from the bulb until just 1 to 2 days before refrigerating — breaking them earlier reduces storage potential
- Step 3 — Place whole bulbs or separated cloves in a paper bag or mesh bag — never sealed plastic which traps moisture and causes rot
- Step 4 — Label the bag with variety name and date entered
- Step 5 — Place in the coldest part of your refrigerator — typically the back of the bottom shelf
- Step 6 — Keep away from fruits — especially apples and pears which release ethylene gas that can affect garlic
- Step 7 — Leave in refrigerator for 6 to 8 weeks — checking occasionally for any signs of mould
- Step 8 — Remove and plant within 1 to 2 days of taking out of refrigerator — plant while still cold
🇯🇲 Jamaica Note: Jamaican gardeners using this technique should begin refrigerating garlic in late August or early September — which is right now for you reading this in September 2026 — for planting in mid to late October or early November. This timing aligns with the beginning of Jamaica’s drier cooler months when soil conditions are most favourable for garlic establishment.
Planting Depth and Orientation — The Details That Matter
Most gardening guides tell you to plant garlic 2 inches deep. This is adequate but it is not optimal for maximum bulb size. Here is what the research and experience of serious garlic growers actually shows:
🧄 SECRET: Plant garlic cloves 3 to 4 inches deep rather than the commonly recommended 2 inches. Deeper planting provides better protection from temperature fluctuations keeps cloves in the more stable moisture environment of deeper soil and — importantly — gives the plant more root zone above the clove which contributes to more stable upright growth and better energy direction into bulb rather than into keeping the plant upright. Deeper planting also provides protection from the frost heave that pushes shallow-planted cloves out of the ground in colder climates.
Orientation matters as much as depth. Always plant garlic cloves with the pointed end facing directly upward and the flat root plate end facing directly downward. This sounds obvious but imprecise planting — cloves placed sideways or at angles — forces the emerging shoot to spend energy reorienting itself before it can grow upward. This wasted energy comes directly at the expense of root development and ultimately bulb size.
Spacing — The Balance Between Competition and Wasted Space
Garlic spacing is a genuine trade-off between individual bulb size and total bed productivity. Wider spacing produces larger individual bulbs but fewer of them. Tighter spacing produces more bulbs per square foot, but each bulb is somewhat smaller. Here is the spacing guide for different goals:
- For maximum individual bulb size — space cloves 8 inches apart in rows 12 inches apart — this is the spacing of serious garlic growers who prioritize quality over quantity
- For the best balance of size and yield — space cloves 6 inches apart in rows 10 to 12 inches apart — recommended for most home gardeners
- For maximum yield per square foot — space cloves 4 to 5 inches apart in rows 8 inches apart — produces more total garlic but smaller individual bulbs
💡 Pro Tip: If you only have limited space and want the largest possible individual bulbs always to choose the wider spacing and plant fewer cloves rather than cramming in more at tighter spacing. You will harvest fewer bulbs, but each will be significantly larger and more impressive — and you will have more of the largest cloves available to save for next season’s planting.
The Planting Sequence — Step by Step
- Water your prepared garlic bed thoroughly 2 to 3 days before planting — moist but not soggy soil is ideal
- Using a dibber stick or trowel mark planting holes at your chosen spacing before separating any cloves
- Separate cloves from bulbs only immediately before planting — leaving papery skin on each clove
- Add a small amount of bone meal to the bottom of each hole if using
- Place each clove pointed end up flat end down at the bottom of the hole
- Cover with soil firming gently to eliminate air pockets
- Water the planted bed gently but thoroughly
- Apply 3 to 4 inches of mulch immediately after planting
As an Amazon Associate, I earn from qualifying purchase.
Mulching — The Secret Weapon of Every Serious Garlic Grower
If you ask any experienced garlic grower what single additional step makes the biggest difference to their garlic size and quality beyond basic good practice almost every one of them will give you the same answer — mulching. Proper mulching after fall planting is arguably the most impactful single action you can take to improve your garlic harvest and yet it is the step most skipped by beginner garlic growers.
What Mulch Does for Your Garlic
- Insulates the soil — moderating temperature extremes that stress developing roots and young shoots
- Retains soil moisture — reducing watering requirements by up to 50 percent during the dry growing season
- Suppresses weeds — garlic hates competition from weeds which compete directly for the nutrients needed for bulb development
- Prevents soil compaction — from rain impact which worsens drainage and root penetration
- Regulates soil temperature — keeping soil cooler in summer which is important for proper bulb curing in warm climates
- Adds organic matter — as it breaks down gradually improving soil structure for future seasons
The Best Mulch Materials for Garlic
Not all mulches are equal for garlic. Here are the best options ranked by effectiveness:
- Straw — the gold standard garlic mulch. Light enough to allow shoots to push through easily thick enough to suppress weeds and retain moisture effectively. Use 4 to 6 inches of straw immediately after planting.
- Dry grass clippings — readily available for most gardeners and excellent for garlic. Apply in layers allowing each layer to dry before adding the next to prevent matting. 3 to 4 inches deep.
- Dried coconut husk — particularly relevant for Jamaican gardeners. Excellent mulch material that is widely available in Jamaica retains moisture well and breaks down slowly adding organic matter to the soil.
- Shredded leaves — excellent mulch that breaks down over the growing season adding organic matter. Shred to prevent matting. 3 to 4 inches deep.
- Wood chip mulch — good for weed suppression but breaks down slowly and can temporarily tie up nitrogen during decomposition. Best used as a pathway mulch between beds rather than directly on garlic beds.
⚠️ Warning: Never use fresh green grass clippings directly on garlic in thick layers. Fresh clippings mat down tightly preventing air circulation and creating conditions for fungal disease. Always allow grass clippings to dry completely before using as mulch — spread them out for a day or two in the sun until they are dry and light before applying to garlic beds.
Growing Season Care — Feeding Watering and the Scape Secret
Once your garlic is planted and mulched the next 6 to 8 months until harvest require consistent attention to feeding watering and a crucial mid-season intervention that most home garlic growers either do not know about or do not understand the importance of — managing the scape.
Feeding Your Garlic for Maximum Bulb Size
Garlic has a long growing season and needs consistent nutrition throughout. A strategic feeding schedule that matches the plant’s changing nutrient needs through different growth stages is significantly more effective than single applications or no feeding at all.
The Three-Stage Feeding Strategy
- Stage 1 — Early establishment — November through January: Once shoots emerge begin light feeding with a balanced fertilizer. The focus at this stage is root development and establishing healthy vigorous plants. Apply a balanced liquid fertilizer at half strength every 3 to 4 weeks.
- Stage 2 — Leaf development — February through April: This is the most critical feeding period. Healthy garlic needs to produce as many leaves as possible before bulb formation begins — because the number of leaves a garlic plant produces directly determines the number of cloves in the final bulb. Increase feeding to full strength balanced fertilizer every 2 weeks. Nitrogen is particularly important at this stage for maximum leaf development.
- Stage 3 — Bulb swelling — May through harvest: As garlic transitions from leaf growth to bulb development nitrogen feeding should stop completely. Switch to a low-nitrogen high-potassium fertilizer to support bulb swelling rather than further leaf growth. Excess nitrogen at this stage actually reduces final bulb size by encouraging the plant to continue producing leaves rather than filling its bulbs.
🧄 SECRET: The timing of transitioning from nitrogen-rich to potassium-rich feeding is one of the most precise decisions in garlic growing. The trigger point is when the lower leaves begin to yellow and die back naturally — usually in early to mid-spring. This natural yellowing signals that the plant has shifted its energy from top growth to bulb development. This is when you stop nitrogen feeding and switch to potassium. Getting this timing right has a significant impact on final bulb size.
Watering — The Precise Schedule That Produces Huge Bulbs
Garlic watering needs change dramatically through its long growing season and getting the watering schedule wrong at any stage costs bulb size. Over-watering causes root rot and encourages disease. Under-watering stunts bulb development. But the most critical and most commonly misunderstood watering rule in garlic growing is this:
🧄 SECRET: Stop watering garlic completely 2 to 3 weeks before your expected harvest date. This final dry-down period is essential for producing well-formed bulbs with tight papery outer skin that stores well. Garlic harvested from continuously watered soil has loose wet outer skin that deteriorates quickly splits apart and is prone to mould during curing and storage. The dry-down period also concentrates flavour compounds in the bulbs producing significantly more flavourful garlic.
The Seasonal Watering Guide
- After planting through December — water lightly every 7 to 10 days if no rainfall — focus on root establishment not heavy watering
- January through March — water every 5 to 7 days during dry periods — plants are establishing and beginning active growth
- April through May — water every 3 to 5 days — this is active bulb swelling and is when garlic needs the most consistent moisture
- Final 2 to 3 weeks before harvest — stop all watering completely — the dry-down period
The Scape Secret — The Intervention That Adds 30 Percent to Bulb Size
This is perhaps the most valuable and most underutilized secret in all of garlic growing — and it applies specifically to hard neck garlic varieties. In early summer hard neck garlic produces a flower stalk called a scape that curls upward from the center of the plant. Most beginner garlic growers either do not notice it or leave it on the plant thinking it looks interesting. This is a costly mistake.
🧄 SECRET: Remove garlic scapes promptly when they appear — as soon as they have formed one complete curl. Cutting the scape redirects the enormous amount of energy the plant would have used to produce seeds into the developing bulb instead. Research and practical experience consistently show that timely scape removal increases final bulb weight by 20 to 30 percent compared to leaving scapes on the plant. This is the single mid-season intervention with the highest return for effort in all of garlic growing.
The good news is that garlic scapes are delicious — one of the most prized seasonal ingredients in good cooking. They have a mild garlicky flavor and a tender crisp texture perfect for stir-fries pesos pasta soups and countless other dishes. Removing the scape is not a waste — it is a bonus harvest that also dramatically improves your main harvest.
💡 Pro Tip: Harvest scapes when they have formed exactly one complete curl. At this stage they are at their most tender and flavorful for eating AND at the optimal time for redirecting plant energy into bulb development. Scapes left until they straighten out have been on the plant too long — both for eating quality and for bulb size benefit.

Harvesting and Curing — The Final Steps to Perfect Garlic
Everything you have done over the past 6 to 8 months — the careful soil preparation the perfect clove selection the strategic feeding and watering the timely scape removal — comes down to these final critical steps. Harvest too early and your bulbs have not reached their maximum size. Harvest too late and cloves begin to separate and the papery skin deteriorates. Cure incorrectly and months of work are lost to rot or premature drying.
Knowing Exactly When to Harvest
The most reliable indicator for garlic harvest timing is the condition of the leaves. Count the leaves on a representative garlic plant. When approximately half of them have yellowed and died back while the other half remain green your garlic is at the perfect harvest stage — bulbs are fully formed but the outer wrapper leaves are still intact enough to protect the bulb through curing and storage.
Other harvest indicators:
- The outer skin of a test-harvested bulb is papery and well-formed — not thin and wet
- The cloves feel firm and well-filled when you squeeze a bulb gently through the soil
- The soil has been dry for 2 to 3 weeks as planned
- For hardneck varieties — the scape was removed 4 to 6 weeks ago
⚠️ Warning: Never harvest garlic by pulling straight up — this often breaks the stem at the neck which dramatically reduces storage quality and allows disease entry. Always loosen the soil with a fork or trowel first before carefully lifting each bulb by hand. Work the fork or trowel into the soil 10 to 15cm away from the plant to avoid cutting through cloves.
The Curing Process — Transforming Fresh Garlic Into Long-Storing Gold
Freshly harvested garlic is not yet the finished product you store and cook with. It needs to go through a curing process that dries and hardens the outer papery skin concentrates the flavour and prepares the bulb for long-term storage. Improperly cured garlic deteriorates within weeks. Properly cured garlic can store for 6 to 12 months depending on variety.
The Curing Method
- Do not wash harvested garlic — leave all soil on the bulbs and do not wet them
- Lay bulbs in a single layer on slatted trays or hang in bunches from their stems in a location with good air circulation
- Ideal curing conditions — warm 20 to 30 degrees Celsius with good air circulation and low humidity — out of direct rain
- In Jamaica’s climate — a covered veranda or shed with good airflow is ideal for curing
- Cure for 3 to 4 weeks — longer for large bulbs which contain more moisture
- Garlic is fully cured when the outer skin is completely dry and papery the neck above the bulb is tight and dry and the roots have dried to a crisp texture
- After curing — trim roots to about 1cm and trim stem to 2 to 3cm for softneck or clean up for hardneck
💡 Pro Tip: The quality of your garlic curing environment makes an enormous difference to final storage quality. The three enemies of good curing are dampness direct sun and poor airflow. A covered outdoor area that is shaded but has excellent natural airflow from prevailing breezes is close to ideal. In Jamaica’s climate the months of October through February when rainfall is lower provide near-perfect natural curing conditions.
Storing Your Cured Garlic for Maximum Life
Once fully cured garlic stores best at cool room temperature — never in the refrigerator which causes sprouting — in good air circulation and away from direct light. Mesh bags wooden crates with slatted sides or purpose-made garlic braids all provide the good airflow that prevents moisture build-up.
- Softneck varieties — store for 6 to 12 months in ideal cool dry conditions
- Hardneck varieties — store for 3 to 6 months — shorter shelf life but superior flavour
- Best temperature — 15 to 18 degrees Celsius with 40 to 60 percent humidity
- Always save your largest and best bulbs from each harvest for replanting next fall — this is how you continuously improve your local variety over multiple seasons
Troubleshooting — Solving the Most Common Garlic Problems
Even with the best preparation and care garlic can encounter problems. Here are the most common issues garlic growers face and exactly how to diagnose and address each one:
Small Bulbs Despite Good Care
This is the most common and most frustrating garlic growing problem. The most likely causes in order of frequency are:
- Cloves planted too small — always use only the largest outer cloves for planting
- Insufficient vernalization — cold exposure was inadequate for proper bulb division
- Planted too late — not enough growing time before hot weather triggers premature harvest
- Soil pH out of range — nutrients present but unavailable to the plant
- Scape not removed on time — energy went into seed production not bulb development
- Harvested too early or too late — timing errors significantly reduce bulb quality
Yellowing Leaves Before Expected
Some yellowing of lower leaves in late spring is completely normal and signals the transition from top growth to bulb development. Yellowing that begins much earlier or progresses up the plant rapidly indicates a problem:
- Nitrogen deficiency — feed with nitrogen-rich fertilizer immediately if in active growth stage
- Overwatering and root rot — reduce watering immediately and improve drainage
- Fusarium basal rot — a fungal disease of the root plate — no cure remove affected plants
- Onion yellow dwarf virus — viral disease spread by aphids — remove affected plants
Splitting or Separating Cloves
Bulbs where cloves have pushed through and separated the outer wrapper are a storage and quality problem caused by:
- Harvesting too late — bulbs left in the ground too long always split
- Inconsistent watering — alternating dry and wet periods cause cloves to swell irregularly
- Warm soil temperatures — particularly in tropical climates where soil stays warm through the growing season
The Complete Guide for Jamaican Garlic Growers
Growing garlic in Jamaica presents specific challenges and opportunities that deserve dedicated attention. With the right approach Jamaican home gardeners can grow impressive garlic despite the tropical climate — and in some respects Jamaica’s conditions offer advantages that temperate climate gardeners would envy.
The Jamaican Garlic Growing Calendar
- August to September — refrigerate garlic cloves for pre-vernalization — 6 to 8 weeks minimum
- October to November — plant vernalized cloves in well-prepared beds — optimum timing
- November to December — mulch beds water lightly apply first light feeding as shoots emerge
- January to February — increase feeding for leaf development stage — this is your critical growth period
- March to April — transition to potassium feeding as lower leaves begin yellowing
- April to May — stop all watering 3 weeks before expected harvest — the dry-down period
- May to June — harvest when half the leaves have yellowed — cure for 3 to 4 weeks
- July to August — store cured garlic — save best bulbs for next season’s refrigeration starting in August
Best Growing Locations in Jamaica
- Blue Mountains and Portland — naturally cool enough for garlic vernalization without refrigeration — ideal garlic growing conditions
- St Elizabeth hills and Manchester — cooler dry conditions — good for garlic with refrigerator pre-vernalization
- Clarendon and south coast — hot and dry — use refrigerator pre-vernalization and provide afternoon shade during peak growing season
- Kingston and urban areas — roof gardens and elevated balconies that receive good wind exposure — use pre-vernalization
Garlic as a Jamaican Kitchen Essential
Garlic is used in virtually every Jamaican savoury dish — from jerk seasoning to escovitch fish to rice and peas to brown stew chicken. The average Jamaican household uses garlic almost daily making home-grown garlic one of the most practical and immediately useful crops any Jamaican gardener can produce. Growing your own garlic means always having fresh full-flavoured garlic available — far superior in flavour to the commercially grown garlic that travels long distances to reach Jamaican markets.
🇯🇲 Jamaica Note: Growing garlic in Jamaica is genuinely worth the effort despite the climate challenges. Even small harvests of home-grown garlic in Jamaica provide fresh full-flavoured bulbs that are noticeably superior to the imported commercial garlic typically available in Jamaican supermarkets and markets. The flavour difference between freshly cured home-grown garlic and the supermarket garlic that has been stored for months and shipped from overseas is remarkable and immediately noticeable in your cooking.
Related Articles You Might Find Helpful
🌱 How to save seeds from summer vegetables — complete step-by-step guide for 2027
🌱 How to make compost at home — turn your kitchen scraps into free fertilizer
🌱 Natural pest and disease control — proven natural remedies to protect your Jamaican vegetable garden
🌱 Seasonal and climate-adaptive gardening — the complete guide for Jamaican and tropical gardeners
Your Garlic Journey Starts Right Now
You now know every secret that separates the gardeners who harvest huge, impressive garlic bulbs from those who struggle with small disappointing results. You know why fall planting is non-negotiable and what vernalization actually does. You know how to build soil that produces monster bulbs. You know how to select plant and space your cloves for maximum size. You know the scape secret that adds 30 percent to your harvest. And you know how to harvest and cure your garlic to preserve all those months of careful work.
The garlic you plant this fall — planted correctly into well-prepared soil with the knowledge you now have — will be harvested next summer as some of the largest most flavourful garlic you have ever grown. And when you pull those first fat heavy bulbs from the soil next summer and that deep rich garlic smell fills the air around you remember that it started today — with a decision to do it properly and the knowledge to back that decision up.
Start today. Plant this fall. Harvest huge garlic next summer. 🧄🌱
Did this guide help you understand how to grow bigger better garlic? Leave a comment below — I read and respond to every single one and would genuinely love to hear about your garlic growing journey. Thank you for reading and happy growing! 🌱