Your Complete Guide to Eco-Friendly Growing
Growing your own vegetables is one of the most rewarding ways to connect with nature while providing fresh, healthy food for your family. But did you know that how you garden can make a significant impact on the environment? Sustainable vegetable gardening isn’t just about growing food—it’s about creating a thriving ecosystem that works in harmony with nature while minimizing waste and environmental impact.
Whether you’re a complete beginner or looking to make your existing garden more eco-friendly, this comprehensive guide will walk you through everything you need to know about sustainable vegetable gardening. From soil health to water conservation, we’ll explore practical, step-by-step methods that will help your garden—and the planet—grow and glow.
Understanding Sustainable Vegetable Gardening
Sustainable gardening is an approach that focuses on working with natural systems rather than against them. It emphasizes building healthy soil, conserving water, reducing chemical inputs, and creating biodiversity that supports both plants and beneficial wildlife. The goal is to create a garden that can maintain itself over time while producing abundant, nutritious vegetables.
This approach benefits not only the environment but also your wallet and health. Sustainable gardens typically require fewer external inputs over time, produce more nutritious food, and create beautiful spaces that support local wildlife.
Tip 1: Build and Maintain Healthy Soil

Healthy soil is the foundation of any successful sustainable garden. Unlike conventional gardening that often relies on synthetic fertilizers, sustainable gardening focuses on building soil that naturally provides everything plants need to thrive.
Step-by-Step Soil Building Process:
Step 1: Test Your Soil Before making any amendments, understand what you’re working with. Purchase a basic soil test kit from your local garden center or send a sample to your county extension office. You’ll want to know your soil’s pH level, nutrient content, and organic matter percentage.
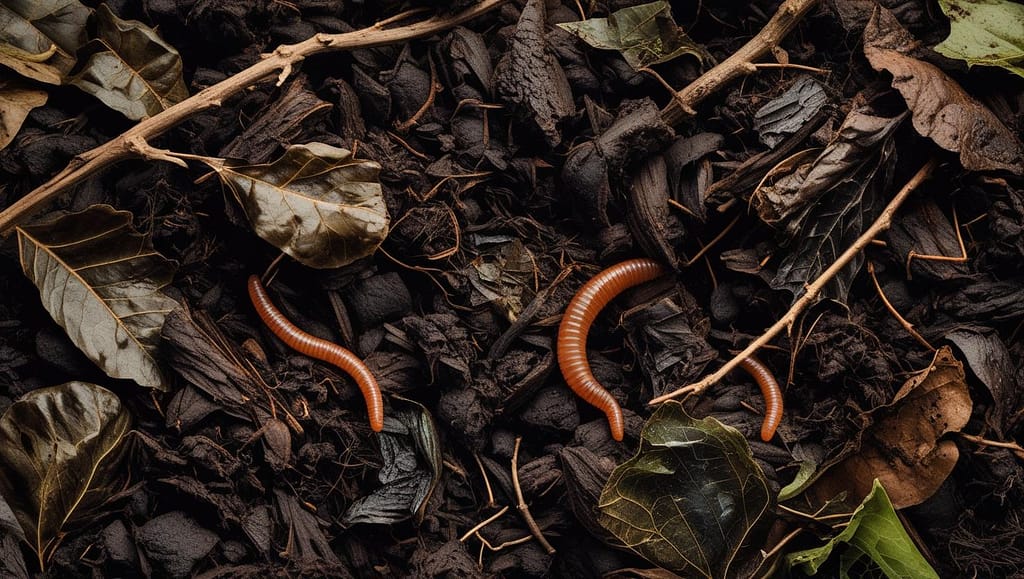
Step 2: Add Organic Matter The secret to great soil is organic matter. In fall, spread a 2-4 inch layer of compost, well-aged manure, or leaf mold over your garden beds. Don’t dig it in—let earthworms and soil microorganisms do the work for you over winter.
Step 3: Practice No-Till Methods Avoid tilling or digging your soil unnecessarily. Tilling destroys soil structure and disrupts the beneficial fungal networks that help plants access nutrients. Instead, use broadfork tools to gently loosen compacted areas without turning the soil over.
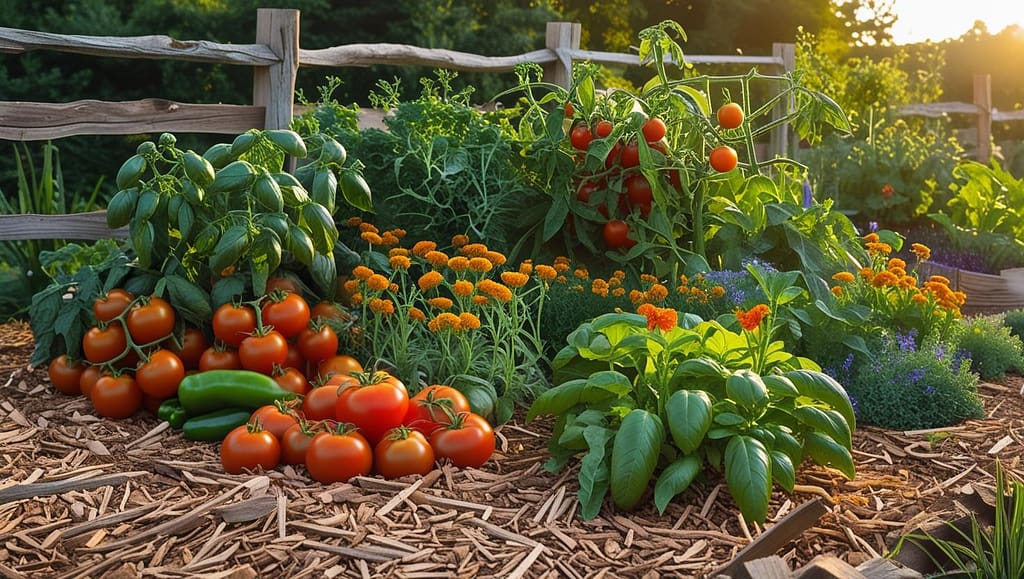
Step 4: Maintain Soil Coverage Bare soil is vulnerable to erosion and loses moisture quickly. Keep your soil covered with mulch, cover crops, or living plants year-round. In growing areas, use organic mulches like straw, grass clippings, or shredded leaves.
Step 5: Monitor and Adjust Test your soil annually and observe how your plants respond. Healthy soil should be dark, crumbly, and full of earthworms. If you notice poor plant performance, consider adding specific organic amendments like kelp meal for trace minerals or rock dust for long-term nutrient release.
Tip 2: Implement Water-Wise Gardening Techniques
Water conservation is crucial for sustainable gardening, especially as climate patterns become more unpredictable. Smart watering practices not only conserve this precious resource but also create stronger, more resilient plants.
Step-by-Step Water Conservation Strategy:
Step 1: Install Drip Irrigation or Soaker Hoses These systems deliver water directly to plant roots, reducing waste from evaporation and preventing water from reaching weed seeds. Set up your system early in the season, running lines along each row of vegetables.
Step 2: Apply Deep Mulch Spread 3-4 inches of organic mulch around plants, keeping it a few inches away from plant stems. Good options include straw, grass clippings, shredded leaves, or wood chips. This reduces evaporation by up to 70% and suppresses weeds.
Step 3: Water Deeply but Less Frequently Instead of daily light watering, water thoroughly 2-3 times per week. This encourages roots to grow deep, making plants more drought-tolerant. Water early morning to minimize evaporation.
Step 4: Collect and Store Rainwater Install rain barrels or create simple catchment systems to harvest free rainwater. A 1,000 square foot roof can collect about 600 gallons from just one inch of rainfall.
Step 5: Choose Appropriate Varieties Select vegetable varieties that are naturally adapted to your climate. Look for drought-tolerant varieties and heirloom seeds that have been grown in your region for generations.
Tip 3: Create Natural Pest Management Systems

Sustainable pest management focuses on prevention and natural balance rather than elimination. The goal is to create an ecosystem where beneficial insects help control harmful pests naturally.
Step-by-Step Integrated Pest Management:
Step 1: Encourage Beneficial Insects Plant flowers that attract predatory and parasitic insects throughout your garden. Good choices include marigolds, nasturtiums, alyssum, yarrow, and herbs like dill and fennel. Aim for continuous blooms from spring through fall.
Step 2: Practice Companion Planting Certain plants naturally repel pests or improve the growth of their neighbors. Plant basil near tomatoes, marigolds near brassicas, and nasturtiums near cucumbers. Research companion planting charts for your specific vegetables.
Step 3: Use Physical Barriers Protect young plants with row covers, create collars from cardboard tubes to prevent cutworms, and use copper tape around raised beds to deter slugs. These methods prevent problems before they start.
Step 4: Monitor Regularly Walk through your garden daily, checking the undersides of leaves and looking for early signs of pest problems. Early detection makes natural control methods much more effective.
Step 5: Apply Organic Controls When Necessary If pest populations exceed beneficial insect control, use targeted organic methods. Bacillus thuringiensis (Bt) for caterpillars, insecticidal soap for soft-bodied insects, and neem oil for various pests can be effective when used properly.
Tip 4: Practice Crop Rotation and Succession Planting
Rotating crops and succession planting are fundamental practices that maintain soil health, reduce pest and disease pressure, and maximize harvest yields throughout the growing season.
Step-by-Step Rotation and Succession Strategy:
Step 1: Divide Your Garden into Sections Create at least three, preferably four, distinct growing areas in your garden. Each section will rotate through different plant families over the years.
Step 2: Group Plants by Family Learn the main vegetable families: nightshades (tomatoes, peppers, eggplant), brassicas (cabbage, broccoli, kale), legumes (beans, peas), and root vegetables (carrots, beets, radishes).
Step 3: Plan Your Rotation Schedule Year 1: Section A gets heavy feeders (nightshades), Section B gets light feeders (root vegetables), Section C gets soil builders (legumes). Rotate clockwise each year.
Step 4: Implement Succession Planting For continuous harvests, plant new crops every 2-3 weeks. This works especially well for lettuce, radishes, beans, and carrots. Keep detailed planting records to optimize timing.
Step 5: Use Green Manure Crops In unused sections or after harvest, plant cover crops like crimson clover, winter rye, or buckwheat. These add organic matter, prevent erosion, and improve soil structure.
Tip 5: Composting and Waste Reduction

Creating your own compost is perhaps the most impactful sustainable gardening practice. It reduces household waste, creates nutrient-rich soil amendment, and closes the loop in your garden ecosystem.
Step-by-Step Composting Guide:
Step 1: Choose Your Composting Method Options include traditional bins, tumbling composters, or simple pile systems. Consider your space, time commitment, and local regulations when choosing.
Step 2: Understand the Green and Brown Balance Collect “green” materials (nitrogen-rich): kitchen scraps, fresh grass clippings, and garden waste. Collect “brown” materials (carbon-rich): dry leaves, paper, cardboard, and straw. Aim for a 3:1 brown-to-green ratio.
Step 3: Build Your Pile Properly Layer brown and green materials, ensuring each layer is moist but not soggy. Start with browns on the bottom, add greens, then browns, continuing until your pile is 3-4 feet high.
Step 4: Maintain Your Compost Turn your pile every 2-4 weeks to add oxygen and speed decomposition. Keep it as moist as a wrung-out sponge. The internal temperature should reach 130-160°F in an active pile.
Step 5: Harvest and Use Finished Compost Compost is ready when it’s dark, crumbly, and earthy-smelling, typically 3-6 months. Screen out large pieces and use the finished compost as mulch, soil amendment, or potting mix component.
Tip 6: Seed Saving and Plant Selection
Saving seeds from your best-performing plants creates varieties perfectly adapted to your specific growing conditions while preserving genetic diversity and saving money.
Step-by-Step Seed Saving Process:
Step 1: Start with Open-Pollinated Varieties Choose heirloom or open-pollinated varieties rather than hybrids. Seeds from these plants will produce offspring similar to the parent plant.
Step 2: Select Your Best Plants Choose seeds from plants that performed well in your specific conditions—those that were disease-resistant, productive, and well-adapted to your climate.
Step 3: Harvest at the Right Time For most vegetables, allow fruits to fully ripen beyond eating stage. Tomatoes should be overripe, beans should rattle in their pods, and lettuce should have gone to seed.
Step 4: Process Seeds Properly Clean seeds thoroughly, removing all pulp and plant material. Some seeds require fermentation (tomatoes) while others just need drying (beans, peas).
Step 5: Store Seeds Correctly Dry seeds completely before storage. Store in labeled envelopes in airtight containers with silica gel packets. Keep in a cool, dark, dry place. Most vegetable seeds remain viable for 2-5 years when properly stored.
Tip 7: Season Extension Techniques
Extending your growing season means more fresh vegetables and better resource utilization. These techniques help you garden sustainably year-round in most climates.
Step-by-Step Season Extension:
Step 1: Use Row Covers and Cloches Protect plants from light frosts with floating row covers or individual plant covers. These can extend your season by 2-4 weeks on each end.
Step 2: Build Cold Frames Construct simple cold frames using old windows and lumber. These mini-greenhouses can protect greens and root vegetables well into winter.
Step 3: Plan for Fall and Winter Growing Plant cold-hardy vegetables like kale, Brussels sprouts, and carrots in late summer for winter harvest. Many vegetables actually improve in flavor after frost.
Step 4: Succession Plant for Continuous Harvest Stagger plantings every 2-3 weeks to ensure continuous harvests. This is especially effective for quick-growing crops like lettuce and radishes.
Step 5: Utilize Microclimates Identify warm spots in your garden—south-facing walls, protected corners, or areas that receive reflected heat. Use these areas to extend the season for tender crops.
Getting Started: Your First Steps
Beginning your sustainable vegetable garden journey doesn’t require mastering everything at once. Start with these foundational steps:
- Begin composting kitchen scraps immediately—this costs nothing and provides future soil amendments
- Choose one small area to convert to sustainable practices
- Start with easy, fast-growing vegetables like lettuce, radishes, and beans
- Focus on improving soil health above all else
- Keep detailed records of what works in your specific conditions
Remember, sustainable gardening is a journey, not a destination. Each season brings new learning opportunities and chances to improve your methods. The key is to start where you are, use what you have, and do what you can.
Conclusion
Sustainable vegetable gardening offers a path to healthier food, a healthier planet, and a more resilient food system. By focusing on soil health, water conservation, natural pest management, and waste reduction, you create a garden that truly grows and glows while supporting the broader ecosystem.
These practices may take time to implement fully, but each small step makes a difference. Start with one or two techniques that resonate with you, and gradually incorporate others as you gain experience and confidence. Your garden—and future generations—will thank you for choosing the sustainable path.
The beauty of sustainable gardening lies not just in the abundant harvests it provides, but in the knowledge that you’re contributing to a healthier, more sustainable world. Every seed you plant using these methods is a vote for the kind of future you want to see. So grab your garden gloves, get your hands dirty, and start growing your sustainable vegetable garden today!
