 Bulb gardens are like nature’s magic show, with blooms popping up when you least expect it. They’re perfect for those who enjoy hands-off gardening with spectacular results. These little packets of life—bulbs—get tucked underground and later burst out with color and fragrance, transforming your space.
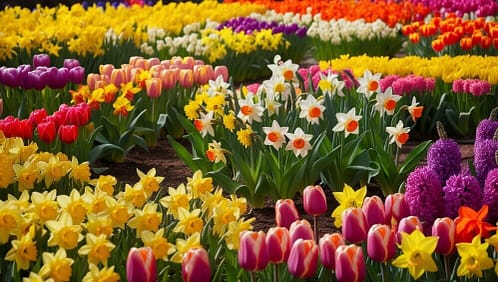
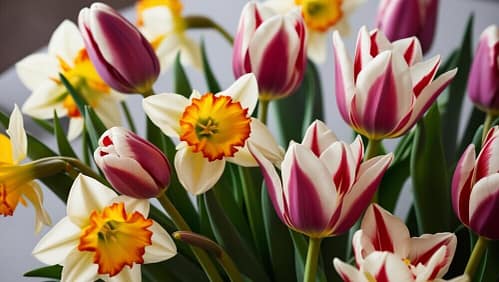
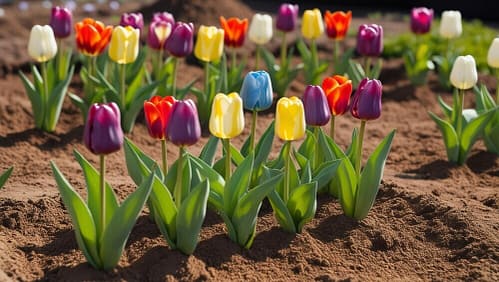
There’s a lot of variety when it comes to bulbs. Picture the elegant tulips, the cheery daffodils, or those dramatic alliums. Bulbs can be annuals that wow for just a single season or perennials that come back year after year.
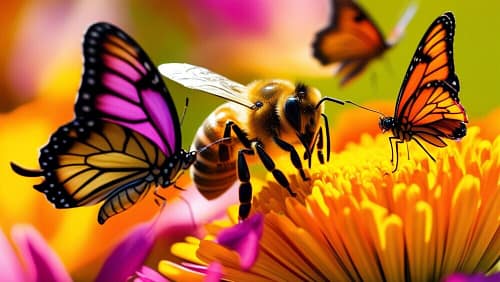
 Planting bulbs isn’t just about pretty flowers. A well-thought-out bulb garden can enhance your landscape design, create a seasonal spectacle, and even support local wildlife. Bees and other pollinators dig bulbs, especially after winter when food is still scarce.
 Starting a bulb garden can feel daunting, but with a bit of planning, it’s manageable and rewarding. This guide will walk through all you need to know about setting up and caring for your bulb garden, ensuring you get those jaw-dropping displays.
Preparing for Bulb Planting
Selecting the right bulbs is like choosing the perfect outfit for an event—it needs to be fitting and remarkable. Consider your climate and soil conditions while picking bulbs. Some bulbs love the cold, while others need a bit more warmth to thrive.
Timing is everything in gardening. Generally, fall is prime time for planting bulbs, giving them enough time to settle in before winter hits. If you’re in the UK, plant from September to December, but check local conditions just to be sure there’s no surprise frost around the corner.
What’s the deal with compost? Well, bulbs thrive in well-drained soil, so enhancing your garden’s soil with rich, organic matter like a good quality compost mix is crucial. This helps bulbs establish strong root systems without becoming waterlogged.
Understanding the right season and preparation steps can make or break your bulb garden. A little effort now sets the stage for a successful bloom later. As you prepare, imagine the lush color palette that will emerge come spring.
Techniques for Planting Bulbs
Planting bulbs might seem tricky, but stick with me, and you’ll be planting like a pro. Start by digging a hole three times deeper than the bulb’s size, with the flat side down. Grouping bulbs close together, about 2-3 inches apart, creates stunning clusters of blooms when they sprout.
 If you’re wondering about patterns, imagine the garden layout. Straight lines suit formal gardens while naturalistic clumps fit more casual settings. Mixing different bulbs with varying blooming times keeps your garden colorful through the seasons.
Some folks soak bulbs before planting, especially in dry areas, to kickstart their growth. But, generally, a healthy bulb should spring to life without any additional soaking.
Ensure they sit snugly in well-aerated soil to help roots settle in fast. After planting, cover bulbs gently with soil and water them to remove air pockets. This beginning a nurturing environment for your future blooms.
Caring for Your Bulb Garden
Once your bulbs are in the ground, it’s time to think about maintenance. Watering right after planting helps settle the soil around the bulbs. However, after the initial watering, make sure you don’t drown them. Most bulbs detest soggy feet, preferring to be left in peace until they send up shoots.
To cover or not to cover? A layer of mulch can go a long way in protecting bulbs from winter’s bite and keeping soil moisture consistent. Just a few inches of organic mulch should do the trick, keeping them cozy till spring arrives.
Pests can put a damper on your bulb garden dreams. Watch out for critters like squirrels and slugs, which might see your bulbs as a tasty snack. Consider using physical barriers or organic repellents to keep them at bay.
Throughout the blooming season, remove any spent flowers to encourage continuous growth. Once the blooms fade, let the foliage die back naturally. This process ensures the bulbs store up energy for the next blooming cycle, setting you up for another season of bright, cheerful gardens.
Gardening is a great hobby and can be a great career have been in the field of gardening for almost some time it is amazing what can happen when we use our imagination or creativity to connect with nature creating pleasing designs that can transform our surroundings. Bulbs are one of my favorite plants because of the variety of colors especially when they are planted in masses look great. I love creating garden designs bringing total change. Thanks for your guide on how to plant bulbs. .
Hey Norman,
Thank you for showing interest in this article: How To Plant A Bulb Garden! and for sharing Gardening is a great hobby, but it also is a great career. It is Good to hear you have also been in the field of gardening for some time now I sure do agree with you on imagination and creativity as I always say, don’t limit yourself when it comes to gardening think outside the box and put your creativity and imagination to work trying something different the result will be spectacular. I am glad to hear that bulbs are your favorite plants when planting bulbs in a pattern, they are amazing and beautiful to look at with those bursting bright, glorious colors.
you are most welcome, and Thanks again for enjoying this article, Happy Gardening.
Garfield
I’ve seen many gardens before, but it’s the first time I heard about bulb garden! And I must say that I was mesmerized…The images you showed are tulips; and these are my favorite flowers! If I have a home and a yard, I’ll probably plant those for myself because it’s a visual pleasure to experiment. Thanks for also talking about maintenance because it’s not enough to start a garden you must also tend to it!
Hi Angelce903
Thank you for commenting on this article, How To Plant A Bulb Garden! Well glad I wrote this article so that you could get to know about bulb gardening, happy to know the image of tulips I show in the article is your favorite flower tulips are one of the bulb groups loved by many people and become a favorite in the garden. I do hope one day you will get to create that beautiful garden of yours, you are most welcome in the discussion about maintenance because maintenance plays an important role in gardening and should top the list on any gardening task.
So thanks once again for your comments and your interest in this article.
Best regards
Garfield
I live in Denver, Colorado, and I’ve heard that daffodils are one of the best bulbs to plant in this region. I’m interested in learning the best practices for planting daffodil bulbs specific to the local climate. Could you provide detailed steps for planting, such as the ideal time of year, soil preparation, and watering requirements? Additionally, I want to ensure that my daffodils return year after year. Are there any specific techniques or care tips you could recommend to help them thrive and rebloom annually in Colorado’s unique environment?
Hey Byron,
thank you for interacting with this article! How To Plant A Bulb Garden is also happy to hear you are interested in learning more about the best practices for planting daffodils, I see where you are asking some questions, but I just wanted to assure you that if you look back on that article, you came across useful guide regarding some of your questions. anyway, let’s get started:
Planting Daffodil bulbs:
1. The ideal time of year: Daffodil bulbs should be planted in the fall, preferably 2-4 weeks before the ground freeze. This allows the bulbs to establish roots before winter sets in. In Colorado, you can typically plant daffodil bulbs in September or October.
2. Soil preparation: Choose a well-draining location with fertile soil for planting daffodil bulbs. Dig a hole that is about 3 times deeper than the height of the bulb. Mixing some compost or organic matter to improve the soil quality.
3. Planting: Place the daffodil bulb in the hole with the pointed end facing upwards. Cover the bulb with soil and gently pat it down. Space the bulbs about 4-6 inches apart to allow room for them to grow.
4. Water Requirements: Water the newly planted daffodil bulbs thoroughly after planting to help settle the soil and encourage root growth. Keep the soil moist but not waterlogged. Daffodils typically do not need much water once they are established.
Tips for Thriving Daffodils in Colorado;s
1. Mulch: Apply a layer of mulch around the planted bulbs to help insulate the soil and protect the bulb from extreme temperature fluctuations in Colorado’sclimate.
2. Fertilization: In early spring, when the daffodils start to emerge, you can fertilize them with a balanced fertilizer to promote healthy growth and flowering. Avoid high-nitrogen fertilizers, as they can promote foliage growth at the expense of flowers.
3. Deadheading: After the daffodils have finished blooming, remove the spent flowers to prevent seed formation. This encourages the plant to focus its energy on storing nutrients in the bulb for the following year’s bloom.
4. Division: Every few years, consider dividing and replanting overcrowded daffodil bulbs to prevent them from becoming too congested and to promote better flowering.
Overall, daffodils are relatively low-maintenance plants that can thrive in Colorado’s unique environment with pepper care and attention. By following these tips and techniques, you can help ensure that your daffodils return year after year, bringing cheerful blooms to your garden.
I hope all the above is helpful to you.
Happy gardening
Garfield